Install your own Booktype server on Ubuntu or Debian

Managed Booktype hosting is available from Sourcefabric, with support for creating both public and private books. If you do not wish to collaborate on writing with authors outside your organization, then having your own Booktype server makes more sense. Also, if you don't have reliable access to the Internet, having your own Booktype server is a practical alternative to cloud-based services. For example, a school with laptops that can connect to each other on a network but not to the Internet may find a local Booktype server valuable.
So here is a step-by-step guide leading you through the installation of Booktype on your own Ubuntu or Debian server.
Setting up the database
Before you can install Booktype on your own server, you will need sudo or root access.
1. Open a terminal, then enter the following command to install PostgreSQL and the Python adaptor for it:
sudo apt-get install postgresql python-psycopg2
2. Create the PostgreSQL user booktype-user with the command:
sudo -u postgres createuser -SDRP booktype-user
Enter the password you wish to set in the database, as prompted. You will need to re-enter it for confirmation.
3. Create a database named booktype-db, setting booktype-user as the owner with the -O option. The encoding should be the international UTF-8 character set, as indicated with the -E option.
sudo -u postgres createdb -E utf8 -O booktype-user booktype-db
4. Allow connections to the database booktype-db for booktype-user by editing the PostgreSQL configuration file. The exact file name depends on the PostgreSQL version that you are using. For example, if the version was 8.4, the command to edit the file on Ubuntu would be:
sudo nano /etc/postgresql/8.4/main/pg_hba.conf
At the end of the file is a section like this:
# TYPE DATABASE USER CIDR-ADDRESS METHOD
Add an extra line at the end of the section like so:
local booktype-db booktype-user md5
Save the file with the keyboard shortcut Ctrl+O, and then quit nano with Ctrl+X.
5. Finally, restart PostgreSQL with the command:
sudo invoke-rc.d postgresql-8.4 restart
Dependency installation
First, install the development packages and Redis server:
sudo apt-get install git-core python-dev python-pip
libjpeg-dev libxml2-dev libxslt-dev redis-server
Next, install the remaining dependencies. The following package installs have been tested on Ubuntu Lucid 10.04. Other distributions may have new enough versions of the packages available via apt-get.
Django, minimum version 1.2
sudo easy_install django
SimpleJSON
sudo easy_install simplejson
South
sudo easy_install South
lxml
sudo easy_install lxml
Unidecode
sudo pip install unidecode
Installing Booktype from the git repository
The git repository contains the most up-to-date version of Booktype available.
1. Create a directory for the Booktype installation such as /var/www/mybooktype and make sure it is owned by the www-data user:
sudo mkdir /var/www/mybooktype/
sudo chown www-data:www-data /var/www/mybooktype/
2. Download a copy of Booktype from the git repository to the /usr/local/src/ directory:
cd /usr/local/src/
sudo git clone https://github.com/sourcefabric/Booktype.git
3. Change to the Booktype/scripts directory like so:
cd Booktype/scripts
4. Switch to the www-data user for the remaining steps:
sudo su www-data
5. Create the Booktype instance:
./createbooki --check-versions --database postgresql /var/www/mybooktype/
6. Change to the installation directory:
cd /var/www/mybooktype/
5. Edit the settings.py file:
nano settings.py
There are several sections of this file which need to be edited to suit your installation. First, set the name and email address of the system administrator:
# DJANGO ADMIN
ADMINS = (
    # ('Your Name', 'your_email@example.com'),
)
Enter the name and domain name of your Booktype server:
# BOOKI
BOOKI_MAINTENANCE_MODE = False

BOOKI_NAME = 'My Booktype site'
THIS_BOOKI_SERVER = 'booktype.example.com'
Enter email and outgoing mail server details:
# E-MAIL OPTIONS
REPORT_EMAIL_USER = 'booktype@example.com'

EMAIL_HOST = 'localhost'
EMAIL_PORT = 25
The database connection parameters should be similar to the following example:
# DATABASE STUFF
DATABASES = {'default': {'ENGINE': 'django.db.backends.postgresql_psycopg2',
                         'NAME': 'booktype-db',
                         'USER': 'booktype-user',
                         'PASSWORD': 'booktype-password',
                         'HOST': 'localhost',
                         'PORT': ''
                        }
            }
where booktype-password is the password that you set for the booktype-user when you created the booktype-db database in PostgreSQL.
If you have more than one application using the local Redis server, you may need to change the value of REDIS_DB to a number other than zero:
# REDIS STUFF
REDIS_HOST = 'localhost'
REDIS_PORT = 6379
REDIS_DB = 0
REDIS_PASSWORD = None
Finally, set the local time zone and the appropriate language code for your installation:
# DJANGO STUFF

AUTH_PROFILE_MODULE='account.UserProfile'

TIME_ZONE = 'Europe/London'

LANGUAGE_CODE = 'en-gb'
Press Ctrl+O to save the file and Ctrl+X to quit the nano editor.
6. Load the environment variables:
. ./booki.env
7. Initialize the database:
django-admin.py syncdb --noinput
8. As suggested by the output of the command above, migrate the remaining parts of the database:
django-admin.py migrate
9. Create a superuser account for the Booktype administrator:
django-admin.py createsuperuser
Enter the required information as prompted.
10. Add common documentation licenses to the new instance of Booktype:
django-admin.py loaddata documentation_licenses
11. Start a test instance of Booktype on a port of your server which is not in use, such as 8005:
django-admin.py runserver 0.0.0.0:8005
12. Leaving the terminal running, open your web browser on the specified port at the localhost IP address of 127.0.0.1, for example http://127.0.0.1:8005/
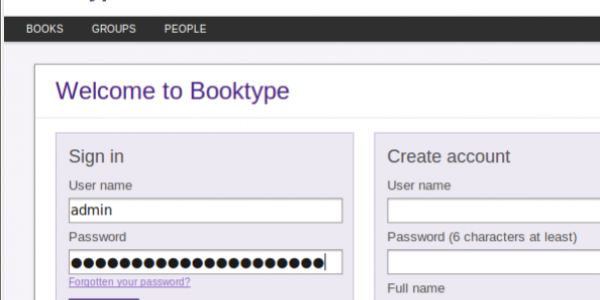
You should see the Booktype Sign in page in your browser. You can sign in using the superuser account details that you created in the installation step above.
Once you are confident that Booktype is installed correctly, you can press Ctrl+C in the terminal to shut down the test instance. Then return to your normal user prompt in the terminal with the command:
exit
So that you are no longer entering commands as the www-data user. See the Booktype manual for details of an Apache configuration that you can use to put your new Booktype server into production.
- For more information on Booktype Pro you can join our newsletter here and be sure to get the latest Booktype Pro news.
